
Table of Contents
How To Control The Ollobot Via IFTTT And Sample App
Author: Alex Cater
Email: cater@unlv.nevada.edu
Date: Last modified on 12/19/2016
Keywords: Ollobot Tutorial, IFTTT app, Ollobot Android sample app

The photo above depicts the Ollobot as seen from the front. The big picture problem is to learn how to control the Ollobot using the IFTTT app in conjunction with the Android sample app. Solving this partially or completely is important because it will bring the user a step closer to implementing their own actions and uses on the Ollobot. This tutorial shows you how to set up the Ollobot and the apps mentioned above and takes approximately one hour to complete.
Motivation and Audience
Readers of this tutorial assumes the reader has the following background and interests:
* Know simple programing concepts
* Interests in automation and vehicle control
The rest of this tutorial is presented as follows:
- Programming <!- delete this line if not applicable →
- Final Words
Parts List and Sources
To obtain an Ollobot you will need to directly contact Robotis either by phone, 949-377-0377, or by email at america@robotis.com. Ollobot is not available to purchase on their site therefor direct contact will be best.
To complete this tutorial, you'll need the following items
| PART NAME/DESCRIPTION | VENDOR | VENDOR Number or URL | PRICE | QTY |
|---|---|---|---|---|
| Ollobot | Robotis | robotis.us | n/a | 1 |
| Android Phone | ||||
| Computer or user phone |
Here is the list as a Google XLS document
Here is the list as a PDF file
Construction
This section gives step-by-step instructions along with photos to construct the Ollobot(if not given fully constructed) and set up the applications.
Step 1
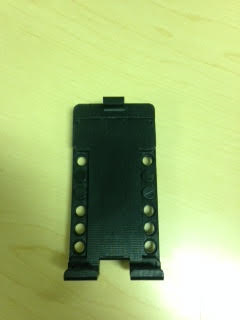

First, there should be three main components given you. There should be the battery pack and the Bluetooth adapter connected to each other as shown above in the second photo. There should also be a phone stand as shown above in the first photo. Lastly there should be the main device that these mount to. (a casing that contains the controller as well as the servos connected to each wheel) It is very simple to connect these together as they just snap on. Snap the phone mount to the front (opposite of the power button) and snap the battery/Bluetooth to the back. Make sure the Bluetooth device is on top. The Bluetooth device will connect directly to a port that is right next to the power button and the battery pack will have two connection cables that connect right behind the phone stand in the middle. Refer to the pictures below.


Step 2
Please refer to this link (http://www.robotis.us/ollobotsdk/) for this part for extra information and requirements.
Now that the Ollobot is set up we need to set up the applications. Click on the link above and navigate to Option 2 on your Android phone. Unfortunately the Ollobot Sample App is only available for Android devices which is why using an Android phone is required for this process. Click the download button for the sample app. It will direct you to a google drive and click on the file to download. The app should now be on your phone and is named “OLLOBOT IFTTT”. The function of this app is to receive a web request from the IFTTT app we will download next and send the commands that it contains to the Ollobot via Bluetooth connection.

Click on 'download' for the sample app in option two.

It will bring you to a google drive. Double click on the file and select download.

The app should appear on your phone after download. It will have the Android logo and will be called “OLLOBOT IFTTT”.
Next, on your other phone install the IFTTT app or go to IFTTT on your computer. Create an account and sign in. IFTTT (If This Then That) allows you to create “recipes” which allow for automation between various devices. Think of an 'if' statement in programming! If a specific requirement is met then a specific action will take place. For example, if the ISS is passing above my location at any given time a notification will be sent to my phone. For us, if a web request is sent to our sample app then the Ollobot will carry our a set of instructions that we have sent with the web request. To get started click on 'My Applets' on the IFTTT homepage and then click 'New Applet“. Click on the big blue 'THIS' and then search for “Maker”. Click on Maker and the click on the Web Request trigger. Name the event whatever you would like. I named mine “move” and then click “make trigger” and then click on the big blue “THAT”. Search for notifications and select it. Then select 'Send Notification'. The contents of the notification will actually be the instructions we send to the Ollobot.
Programming
The commands written within the notification box will be the commands the Ollobot receives and performs. The commands are specified in the picture below and on the SDK for the Ollobot (http://www.robotis.us/ollobotsdk/).

Erase what is already in the notifications box and simply write in the commands above in order the commands are to be carried out. Separate each command with a comma. For my notification I wrote “OLLO, FW50,TR90,BW50,ST” which means the Ollobot will move forward 50 units, then turn right by 90 degrees, then move backwards 50 units and the go into standby mode. Click the 'create action' button and then click 'finish' to create your new applet.
Before we run our commands let's test it with the Sample app. Using your computer search for “Maker” again on the IFTTT homepage and select it. Click on settings for the Maker app. You should see a page like this:

Copy and paste the URL given in another tab. At the top is your key. On the phone mounted to the Ollobot go into the Sample App. At the top there will be a bluetooth icon. Press it and make sure you're connect to the Ollobot via bluetooth. You can test your connection pressing the “LED on” and “LED off” buttons in the app. The LED on the Ollobot should turn on or off accordingly if connected. Then copy your key in the [IFTTT INFO>] section of the app right above the “test it” button. Then right next to the “test it” button write the name of the applet you created and press the “test it” button. If everything is done correctly a notification from the IFTTT app should pop up on your phone. If not then test your connection again, make sure your key is typed in correctly or make your applet is turned on.
Now it is time to run the commands on the Ollobot. Within the Sample App scroll down to the bottom and press “GO!!!”. Then on your computer go to the tab that had your key posted. This page will also be the page that you send the web request in and looks like the page in the picture below. Right under where it says “Make a POST or GET web request to:” type in the name of your applet event where it says “event”. For me, I put “move”. Then click “test it”. If everything is done correctly the Ollobot should carry out each command in order. Make sure your mounted phone is in “GO!!!” mode from the sample app before sending the web request.

Final Words
This is the barebones basics for sending commands to the Ollobot with the IFTTT and Sample app. There are other applets within the IFTTT app that can be used with the Ollobot so feel free to explore and see what else can be used.
For questions, clarifications, etc, Email: cater@unlv.nevada.edu